# Install All Required Components on a Linux Server
A comprehensive guide for manually installing the NDTwin system on a native Linux environment. This section covers system dependencies, building the NDTwin Kernel with Ninja, configuring Python environments, and running the full system.
Canonical URL: https://www.ndtwin.org/docs/ndtwin-installation-manual/ndtwin-kernel/operate-an-emulated-software-network/native-linux-excution-environment/
---
# Native-Linux Execution Environment Setup
This guide provides step-by-step instructions to manually build the Network Digital Twin (NDTwin) environment on a native Linux machine.
## 1. System Requirements
The system has been verified on the following configuration:
* **OS:** Ubuntu 20.04 LTS or higher (Verified on Ubuntu 24.04.3 LTS).
* **Kernel:** Generic Linux Kernel (x86_64).
* **Permissions:** Root access (`sudo`) is required for Mininet and Open vSwitch operations.
---
## 2. Python Environment Setup (for Ryu)
The system requires two specific Python environments to handle version conflicts. **Ryu requires Python 3.8** due to specific library dependencies, while other components may use newer versions.
**Prerequisite:** Ensure [Miniconda](https://docs.anaconda.com/miniconda/) or Anaconda is installed.
### Step 2.1: Create the Ryu Conda Environment (`ryu-env`)
This environment runs the SDN controller.
```bash
conda create -n ryu-env python=3.8 -y
conda activate ryu-env
python --version # should be Python 3.8.x
```
> **Conda TOS Notice (required once)**
> If this is your first time using the Anaconda default channels (`pkgs/main`, `pkgs/r`), you must accept the Terms of Service before creating the environment:
>
> ```bash
> conda tos accept --override-channels --channel https://repo.anaconda.com/pkgs/main
> conda tos accept --override-channels --channel https://repo.anaconda.com/pkgs/r
> ```
### Step 2.2: Install System Build Dependencies
```bash
sudo apt update
sudo apt install -y build-essential python3-dev libssl-dev libffi-dev libxml2-dev libxslt1-dev
```
### Step 2.3: Install Ryu + Compatible Python Libraries
1. **Upgrade pip / setuptools / wheel (compatible versions)**
```bash
pip install --upgrade "pip<24" "setuptools<68" wheel
```
2. **Install Ryu (disable PEP-517)**
```bash
pip install ryu --no-use-pep517
```
3. **Pin required libraries**
```bash
# Eventlet must be <0.33 (0.30–0.31 works)
pip install eventlet==0.30.2
# Greenlet <3
pip install "greenlet<3"
# dnspython <2.3
pip install "dnspython<2.3"
```
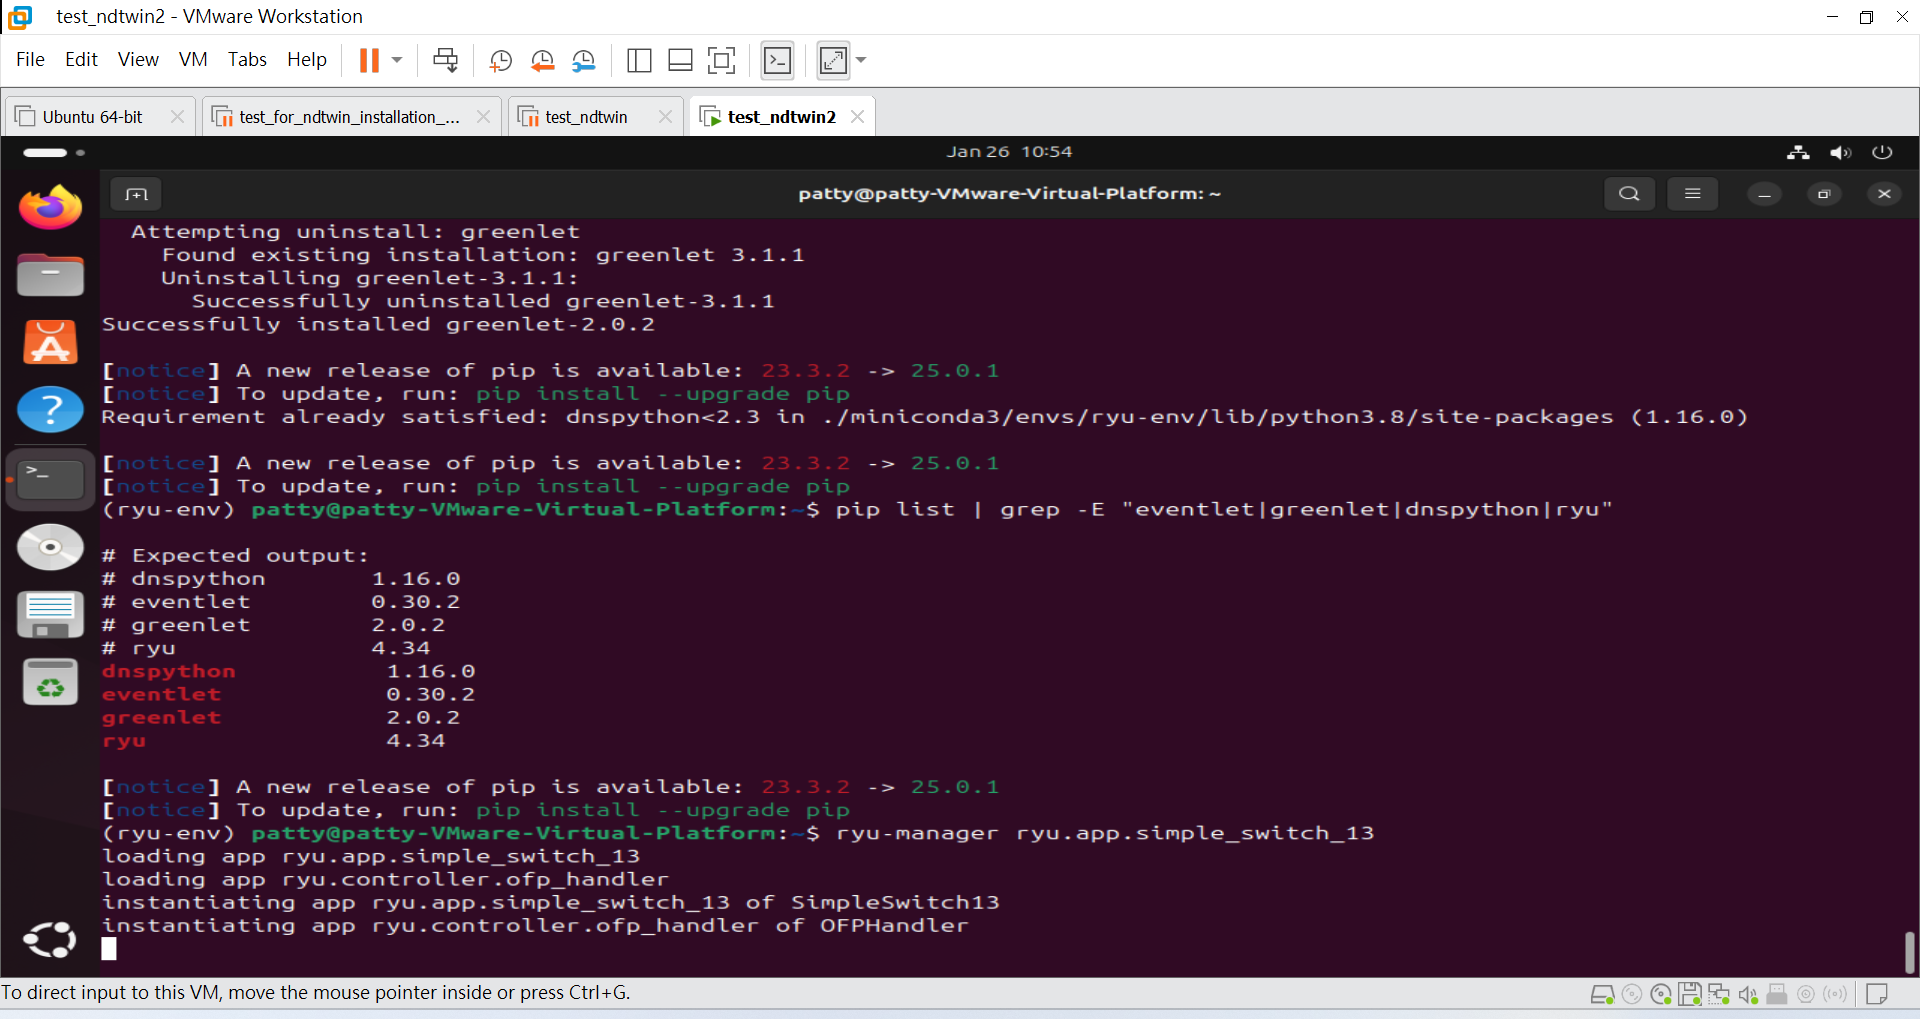
### Step 2.4: Verify Installation
```bash
pip list | grep -E "eventlet|greenlet|dnspython|ryu"
# Expected output:
# dnspython 1.16.0
# eventlet 0.30.2
# greenlet 2.0.2
# ryu 4.34
```
### Step 2.5: Test Ryu
```bash
ryu-manager ryu.app.simple_switch_13
```
### Step 2.6: Prepare the Customized Ryu Controller App
This project uses a customized Ryu (OpenFlow 1.3) controller to:
* Install all-destination IPv4 forwarding entries during startup (proactive routing bootstrap)
* Support static topology mode (load topology from JSON)
* Support dynamic discovery mode if the static file is missing (topology events + host learning via packet-in/ICMP)
* Compute paths and push flow entries to each switch once the topology is ready
1. **Create the Ryu App file in your Home (or any folder)**
```bash
nano intelligent_router.py
```
2. **Paste the controller code**
The full controller implementation is shown below:
Click to expand: intelligent_router.py
{{< codefile path="assets/snippet/intelligent_router.py" lang="python" opts="linenos=table" >}}
> **Note:** Before running the controller, update the parameters in `intelligent_router.py` to match your environment.
3. **Configure deployment parameters (`static_topology_file_path`, `is_mininet`, `switch_num`)**
The controller uses these parameters to decide **how to load/discover the topology** and **when to proactively install all-destination IPv4 flow entries**.
- `static_topology_file_path`: points to your topology JSON (used in *static topology mode*).
- `is_mininet`: set `true` for Mininet, `false` for physical testbed.
- `switch_num`: the controller waits until this many switches are connected before installing initial routing entries.
```python
from pathlib import Path
# (1) Static topology JSON path (update to your local file path)
static_topology_file_path = Path("/home//Desktop/NDTwin-Kernel/setting/StaticNetworkTopology_XXX.json")
# (2) Deployment mode
is_mininet = True # True: Mininet, False: physical testbed
# (3) Number of switches expected to connect before installing initial routing entries
switch_num = 10 # TODO: change to your switch count
```
### Step 2.7: Install required Python libraries for the customized Ryu app
```bash
# Graph algorithms used by the controller
pip install -U networkx
# Pin requests/urllib3 to compatible versions (avoid runtime conflicts)
pip install -U "requests<2.29" "urllib3<2"
```
---
## 3. System Dependencies Installation
You need to install build tools, network analysis utilities, and specific C++ libraries required by the NDTwin Kernel and Mininet.
### Step 3.1: Update & Install Build Tools
We use `ninja-build` for faster compilation and `iperf3`/`wireshark` for traffic generation and analysis.
```bash
sudo apt update
sudo apt install -y build-essential cmake g++ make git \
ninja-build xterm curl wireshark iperf3
```
### Step 3.2: Install Required Libraries & Mininet
Run the following command to install all necessary development libraries and the network emulator:
```bash
sudo apt install -y \
libboost-all-dev \
libfmt-dev \
libspdlog-dev \
libssh-dev \
nlohmann-json3-dev \
mininet \
openvswitch-switch
```
### Step 3.3: Verify Network Components
Ensure Mininet and Open vSwitch (OVS) are installed correctly.
```bash
# Check OVS version
ovs-vsctl --version
# Test Mininet installation (Pingall test)
sudo mn --test pingall
```
---
## 4. Download & Compile NDTwin Kernel
We use CMake and Ninja to compile the C++ core.
### Step 4.1: Download Source Code
If you haven't downloaded the project yet, clone it to your Desktop (or preferred location).
```bash
cd ~/Desktop
git clone https://github.com/ndtwin-lab/NDTwin-Kernel.git
```
### Step 4.2: Compile with Ninja
1. **Navigate to the project directory:**
```bash
cd ~/Desktop/NDTwin-Kernel
```
2. **Prepare the build directory:**
```bash
rm -rf build # Remove existing build directory if present
mkdir build && cd build
```
3. **Compile:**
**Note:** We do not set the build type to "Release" yet as optimization flags are pending refactoring.
```bash
cmake -GNinja ..
ninja clean
ninja -j $(( $(nproc) / 2 ))
```
---
## 5. Prepare Network Topology Script
We rely on a custom Python script (`testbed_topo.py`) to solve **sFlow routing challenges**. This script creates a virtual management network on the loopback interface, allowing the host to receive sFlow packets from Mininet switches without disrupting internet connectivity.
1. **Create the Mininet Script file**
```bash
nano testbed_topo.py
```
2. **Paste the code**
Click to expand: testbed_topo.py
{{< codefile path="assets/snippet/testbed_topo.py" lang="python" opts="linenos=table" >}}
---
## Installation Complete
You have successfully finished installing the environment!
To continue, please follow the [User Manual](../../../NDTwin%20User%20Manual/NDTwin%20Kernel/) to try launching the **NDTwin Kernel** and get started with your experiments.
---